
Using docs.ns-api.com
This API documentation is also a powerful tool allowing you to make API calls to a test server and your own netsapiens platform that is running v44.0+ with support for v2.
Setting Up Server Connection and Authentication
Getting started is as simple as configuring the server settings and establishing authentication. Follow these steps to get started:
Step 1: Configure Server Connection
- Navigate to the "Base URL" section on the right side of the API Reference Page.
- Click on the server name displayed in the "Base URL" value.
This action initiates the process of modifying the server name for your convenience.
Example:
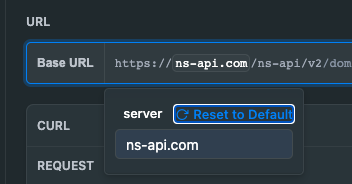
Shows the edit process of the server name.
- Complete the edit process, ensuring accurate representation of your desired server name.
Example:
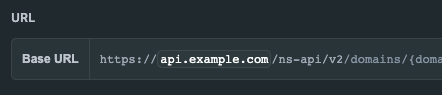
api.example.com shown as new server name.
Step 2: Authenticate for Access
With the server value successfully configured, proceed to set up authentication for secure access. While both API keys and access tokens (access_token) can be utilized, API keys offer the simplest interaction with the documentation tool. However, note that access tokens do have a time-out feature.
- Ensure you possess a valid Bearer token, either in the form of an access token or an API key.
- Integrate the Bearer token into your authentication workflow for seamless connection.
Example:
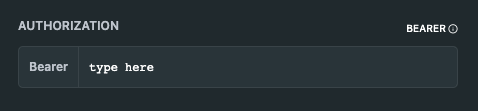
Set valid Bearer token either access_token or apikey
Updated 11 months ago